Wanted to start the new year off with upchanging a few things. If you have not seen my Etsy shop please do! You can visit it at www.homespunkat.etsy.com
0 Comments
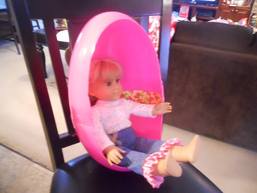
Second day in a row for me to post. Yays! So Ive been given it some thought and figured I would post my instructions here for the egg chair. If your willing to attempt this project, kudos! I purchased one of the Mega Eggs at Hobby Lobby. They are only there for a limited time so I suggest you buy one as soon as possible. Otherwise you'll have to wait until next year to do this project. The large mega egg measures about 16 inches in height. It's a bit smaller than the egg chair that American Girl offers. But it will work. The first thing to do is make a template for the opening. I do not recommend just going commando and cutting an opening because the plastic is difficult to cut and you want to make the right cuts. So grab some wrapping paper, paper, or tissue paper and sketch out basically an egg shape roughly to the size and shape you think would work. Then place the template on the egg and tape it down in areas. Once you do that you can then examine the template and see if you like it, its the right shape and is big enough. You do not want to make it too small, but you also don't want to make it too big. If you make it too small you can always cut off more plastic. But remember the plastic is hard to cut so you want to try to do that only once. Once you have the opening cut out you need to reattach the two halves. I used a white glue, then taped the inside of the egg with duct tape and shipping tape on the outside.Then let it sit overnight to dry. Since the inside is going to be covered I suggest just leaving the duct tape on. The next morning I took the shipping tape off and discovered parts of the seam did not bond. So I ended up using mod melts. Mod melts are a new craft from Plaid that involves a high temp glue gun and rods that are plastic. I ended up using that as a glue as the plastic rods melt and bond with other plastic fairly well. You could also try using a super glue or Gorilla glue. Once you got the egg together I suggest working on the base. For the base I used a 7 1/2 inch diameter plastic plate I bought at the dollar store, a plastic cap from a medicine bottle and a bolt, nut and washer, and white spray paint. 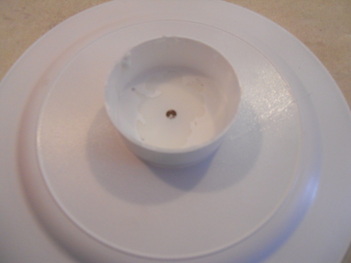
With the plastic plate upside down, glue the bottom of the medicine cup to the bottom of the plate. If you don't have a medicine cup you can use a can. The cup I used was a cover from a large bottle of Miralax. It measures about 1 inch high and 2 inches in diameter. Once you glue them use your white spray paint, (or whatever color you choose) and spray the entire base. This is so you have a uniform color over the base. Once the base is dry, you will drill a hole in the base. (See pic) as well as the bottom of your egg. Then run your bolt through the egg, the cup and the plate and secure with a washer then a nut. This will hold the base to the egg as well as give it some stability. 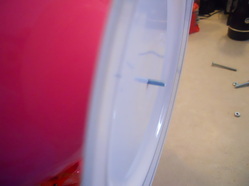
Im really terrible about blogging. Perhaps it has to do with my busy life of raising a child with special needs, crafting, painting, and oh yeah, taking care of a house. Personally I would be much more content to craft all day then mop floors and do other necessary household chores. But I don't like living in a dirty house. So I try to balance it out. Anyhoo......with that said here I am. And I am going to tell you that I am doing this new project called The Great American Doll Craft Challenge. It something I came up with to challenge myself to creating doll items for American Girl dolls. If your not familiar with American Girl, perhaps you should consider that a blessing. They are very expensive and become very addictive. So Ive gone and crafted many doll things. Doll clothes many and some accessories. But Im gearing myself up for more involved projects. 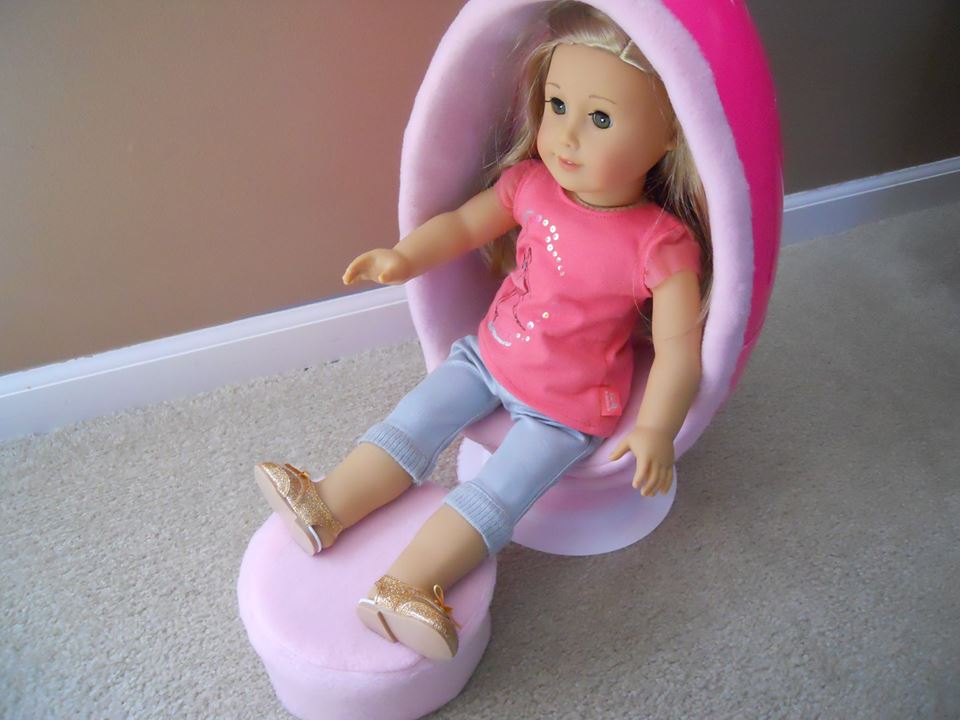 Julie's egg chair has to be one of my favorites. And since my little sweetpea is getting Julie for her birthday, I wanted to do Julie stuff lately.
The egg chair is not for the crafty weak. It is a long time consuming project that involves getting your fingers cut and bruised. And if your the type who slaps a sticker on something and call it a craft, then you'll just need to move on. This is a project for the crafting die-hards. Im in the process also of writing a book for all my doll crafts to go into. Patterns and tutorials for some easy peasy stuff to more elaborate things, like the egg chair. So bear with me. Good crafting is like fine wine, you need to sip it and savor it. Well its been sometime since Ive done an update here. So here it goes. August tends to be a very busy month for me since I enter out local fair. I did extremely well this year taking home about 40 flat ribbons, a Best in Show for a portrait doll, and five trophies for the Bedazzle your Bra contest!! 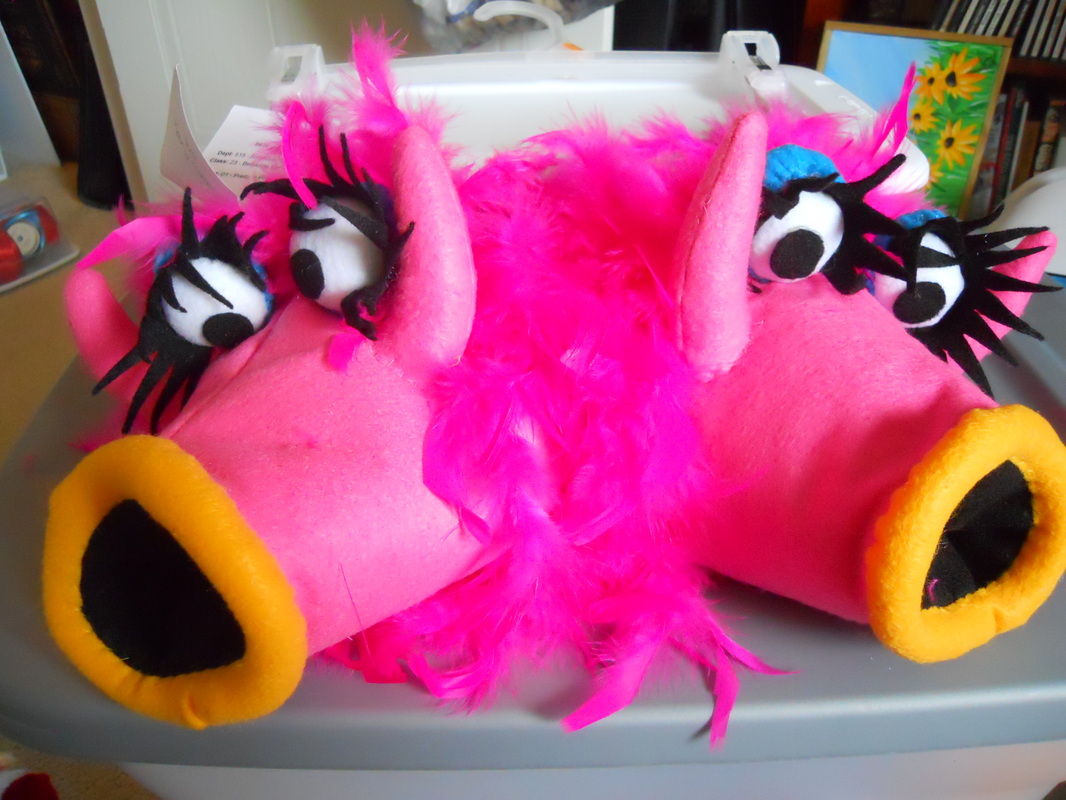 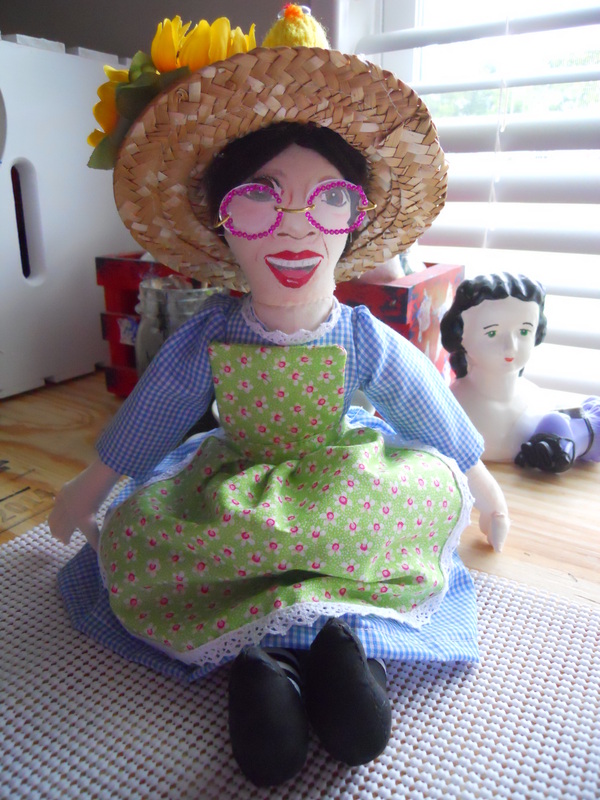 As you can see, one bra is my Muppet bra and the other is my portrait doll of Miss Lillian at Dollywood in Pigeon Forge, TN. In fact, if your ever there go to Miss Lillians Chicken House for dinner and you'll see the doll on display.
Now that the fair is over, I have slowed down a bit. But Ive been busy creating and designing some new things and what I have is some really cute monster cozy's for your cell phone. In fact today Ill be sewing up new one's to fit iphone 6! So keep an eye out for those. I have a few small ones for smaller cell phones already available in my Etsy shop: http://www.pushingupdaizies.etsy.com and they happen to match my plushies! Gosh, I really need to be better about posting and giving updates. Such is the life of a busy mom and artist. The workload never seems to end.
Anyway, please check out the Seaside Miniature Art Show http://www.seasideart.com/product-category/art-by-category/23rd-annual-international-art-show/ You'll need to scroll down to Wermuth and check out my three pieces for the show!! Two are so new that they are not even on my website yet. If your in Nags Head, NC during the month of May, check it out! Lots of fantastic work. Im currently working on a dollhouse for my daughter, and as soon as its complete its back to working on two new art dolls I started back before Christmas. Both are Alice in Wonderland inspired. Unfortunatly my work table is currently cluttered with mini things for the dollhouse. 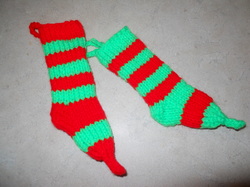 Ive been busy knitting away!! One of the reasons I have not updated by blog lately. But I do want to share this cute pattern I developed to make Whoville stockings to hang from your tree! Im currently decorating one of our smaller trees as a Grinch tree and it needed Whoville stockings. So here is my pattern I developed to share!!
Whoville Christmas Stocking Ornament Size 3 dpn needles and worsted weight yarn 4 in green and red. These stockings will be sewn up in the back and worked as one piece, so you only need two needles. With green cast on 20 sts Row 1 - Knit Row 2- Purl Row 3-Knit Row 4-Purl Change to red yarn Row 5- Knit Row 6-Purl Row 7-Knit Row 8-Purl Change to green yarn Row 9- Knit Row 10- Purl Row 11- Knit Row 12-Purl Change to red yarn Row 13- Knit Row 14-Purl Row 15-Knit Row 16-Purl Change to green yarn Row 17- Knit Row 18-Purl Row 19- Knit Row 20-Purl Change to red yarn Row 21- Knit Row 22-Purl Row 23-Knit Row 24-Purl Change to green, start the heel flap Row 25-Knit Row 26-P13, slip to stitch holder, P6, and slip last stitch to another holder. Next four rows will be worked just on these 6 sitches Row 27-Knit Row 28-Purl Row 29-K3, K2tog, K1- 5 stitches remain Row 30-P3, P2tog, P1- 4 stitches remain Row 31- K4, pick up and knit 3 stitches evenly on side edge of heel flap -7 stitches Row 32-P7, pick up and purl 3 stitches on other side of heel flap and P1 stitch remaining on other holder -11 stitches Row 33-K2tog, K8, K2tog (last stitch from needle and first stitch from holder ) 22 stitches Row 34-Purl Row 35-K2tog, K5, K2tog, K12 -20 stitches Row 36-Purl Row 37-K2tog, K4, K2tog, K12 -18 stitches Row 38- Purl Switch color to red Row 39- thru Row 44 (6 rows total ending with a purl row) Stocking stitch Swith color to green and Form Toe Row 45-(decrease row) K1, K2tog, K2, K2tog, K4, K2tog, K2,K2tog,K1- 14 stitches Row 46-Purl Row 47-K1, K2tog,K1, K2tog, K2, K2tog, K1, K2tog, K1- 10 stitches Row 48-Purl Row 49- K2tog across - 5 stitches Row 50-P2tog, P1, Pstog - 3 stitches Row 51-K3 Create a I Cord with 3 sts 3 rows and cast off. Cut off long tail and thread through loop and tie off the cast off. Then thread the yarn tail through a yarn needle and put through center of I Cord. Now fold stocking with right sides together, making sure I Cord is inside on the rightside of the stocking. With extra tail from I Cord sew up the seam of the stocking matching the stripes. Turn inside out and your stocking is done!! Crochet a chain of 14 and attach or use ribbon. ENJOY!! Fall is officially here. With trees changing color Im enjoying the rich warm tones of fall. But this morning it was a frosty 33 degrees! Brrr.....time to start thinking about spending more time in the studio creating.
So, here is my update from last. Since I noticed its been awhile. Our local fair has come and gone and Im happy to say that I did extremely well!! For the first time not only did I take a first place blue in fine art, but I got TWO!! One for my "Cattle on the Ridgeline" and another for "Sea Turtle", my miniature painting! Always second but never first until now!! In all I took home 34 ribbons and one trophy! This year I also entered the Bedazzle your Bra contest with five decorated bras for Susan G. Koman, an organization that helps women battling breast cancer. My Miss Piggy and Kermit bra took first place! Ive been working on some new pieces, as well have posted some new paintings in the Artwork Gallery 1. I still have more photographing to do of some art dolls to which I hope to upload soon! Just got to get my butt motivated! New pieces Im working on: a 3D mixed media fan art of Alice in Wonderland. Also, I hope to start in the next few days the armature for the body for my next fan art doll "The Red Queen." I've been quite busy lately preparing for our fair. It's an event I do every year now and this will be my fifth year exhibiting my work. Its also the first year that I've entered the Bedazzle Your Bra contest! As well as the first year that I have the most entries I've ever done! This year I will be bringing a total of 34 entries to the fair! And I'm currently working on my very last entry which brings me great joy. For last year I was working up until the night before entries had to be delivered. This year I should have a good three weeks. A new record for me!
One of the catagories I enter is the Fine Arts and I have yet to earn a blue ribbon in that dept. I've won several second place ribbons, but no blue ribbon. Another dept I enter is the doll show and this year I've got some nice work going in. Hopefully I will take another Best in Show this year as I did two years ago. I will hopefully be updating my website with photo albums of dolls because Im in the process of creating some new ones. One being a ball jointed doll. Never have I done that and so far she's coming out very well. She'll be part of "The Alice Project." A collection of dolls depicting Alice in Wonderland. Well, its been one of those summers. Not much going on. We did decide to take "off" the rest of summer, basically from our daughters speech therapies and get in some much needed relax time before school starts. One of my projects is working on fair entries. I've got a fair amount entered, no pun intended. But one of the catagories I entered is the animal doll category, and it gave me the push I needed to finish an art doll I had started months ago. It's "The White Rabbit" from Alice in Wonderland and once I had a vision in my head how to execute it, I couldn't wait to finish it. 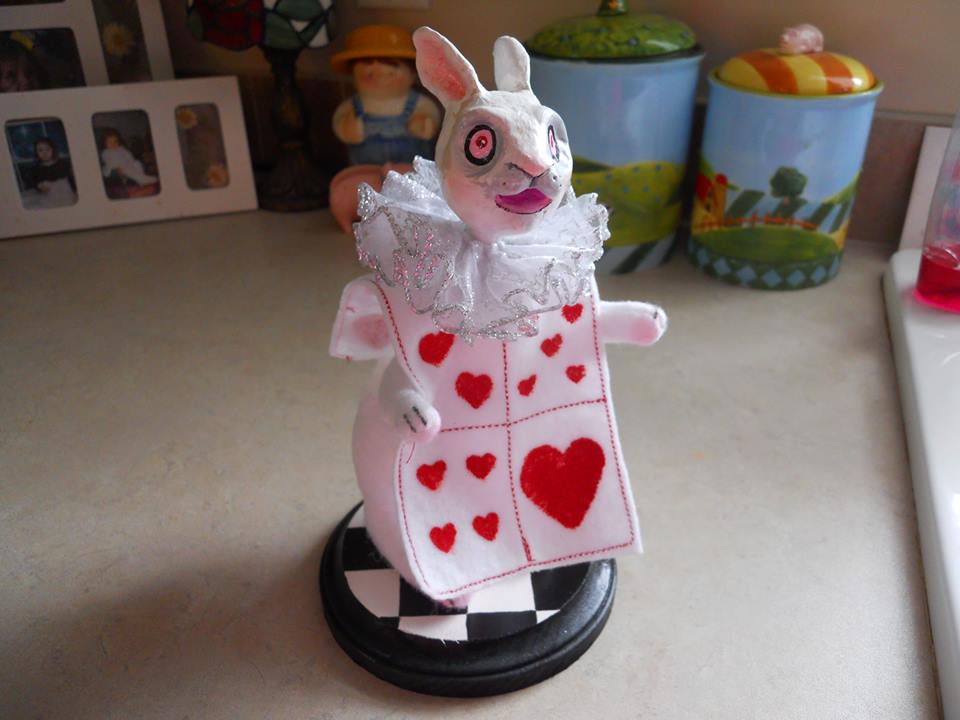
I still have a few more items to create, like knitting items that shouldn't take me too long. But I'm also working on a "goth" Alice for a friend, and once she is done I'm creating a more "gothic" looking Alice than the first one. I also have been re-designing a doll pattern I have to be smaller scale. As well another unique art dol
Well slow and steady wins the race they say. Let's hope that is true! Not that I'm in any race. LOL.
Well, this is what I've been up to. I've been working on a new doll to which I ended up creating the arm and hands 15 times before I actually got to one I really liked. I learned a new technique for turning little cloth fingers and wished I knew about a long time ago! Certainly would have saved me some gray hairs!! But the good thing is that I now know about it. I completed my fairy baby canvas doll and you can see her here: http://katworks.weebly.com/artwork-gallery-i.html She's in my Artwork 1 Gallery and I have to say I really liked how she came out. Now Im working on a mermaid one and hope to have her complete by the end of the week. As well as more work done on the "hands" doll since she caused me so much grief! And when she's done, I'll have to start in on creating her sister. I'm not going to say much ri |
Kat....Musings of an Artist
Categories |
 RSS Feed
